How to create Google Web Story using our 3schools Make Story 2.0
Now, we are more easy, more friendly, more professional. Let me introduce "3schools Make Story 2.0".
3schools Make Story 2.0 Provides
- 1. One premium news template with Google Web Story page. View Demo
- 2. Don't need to go to Blogger. Login, create, customize, publish Web Story & Article from our dashboard.
- 3. Our new version provides default customized pages. Choose from there & ready to go. View All Pages
- 4. Need users' attention? Instantly add GIF and Pexels images with a single click, no upload required!
- 5. Using this version, you can also create web stories with quizzes.
- 6. World's first comment support in a web story? 3schools make it possible with Facebook comment! View Demo
- 7. Meet 3schools MakeStory AI! Just write the topic & select pages. Our AI will create a web story for you.
- 8. Meet 3schools Post Editor! write seo friendly blog post, news article etc. (Add table, faq, images, buttons, post, Web Story, image slideshow, author bio etc.) Learn more about 3schools post editor.
- 9. Send Push Notifications & enable Google discover. Learn more about Webpushr.

How To Create Web Story Using This Tool?
Step 1:- Go to Blogger => Create New Blog => Add Custom Sub-domain => Upload Our New Template. Download the template.
Step 2. In this template, you can create blog post / news article / about us page in the post section of Blogger dashboard. Only the page section will be used to create Web Story.
To display your all Web Stories together like this page, you must create a post with the following details.
 post title   : Web Stories
 Labels       : NOTOC
 published on : 2 January 2024
 post body    : copy & paste the below code
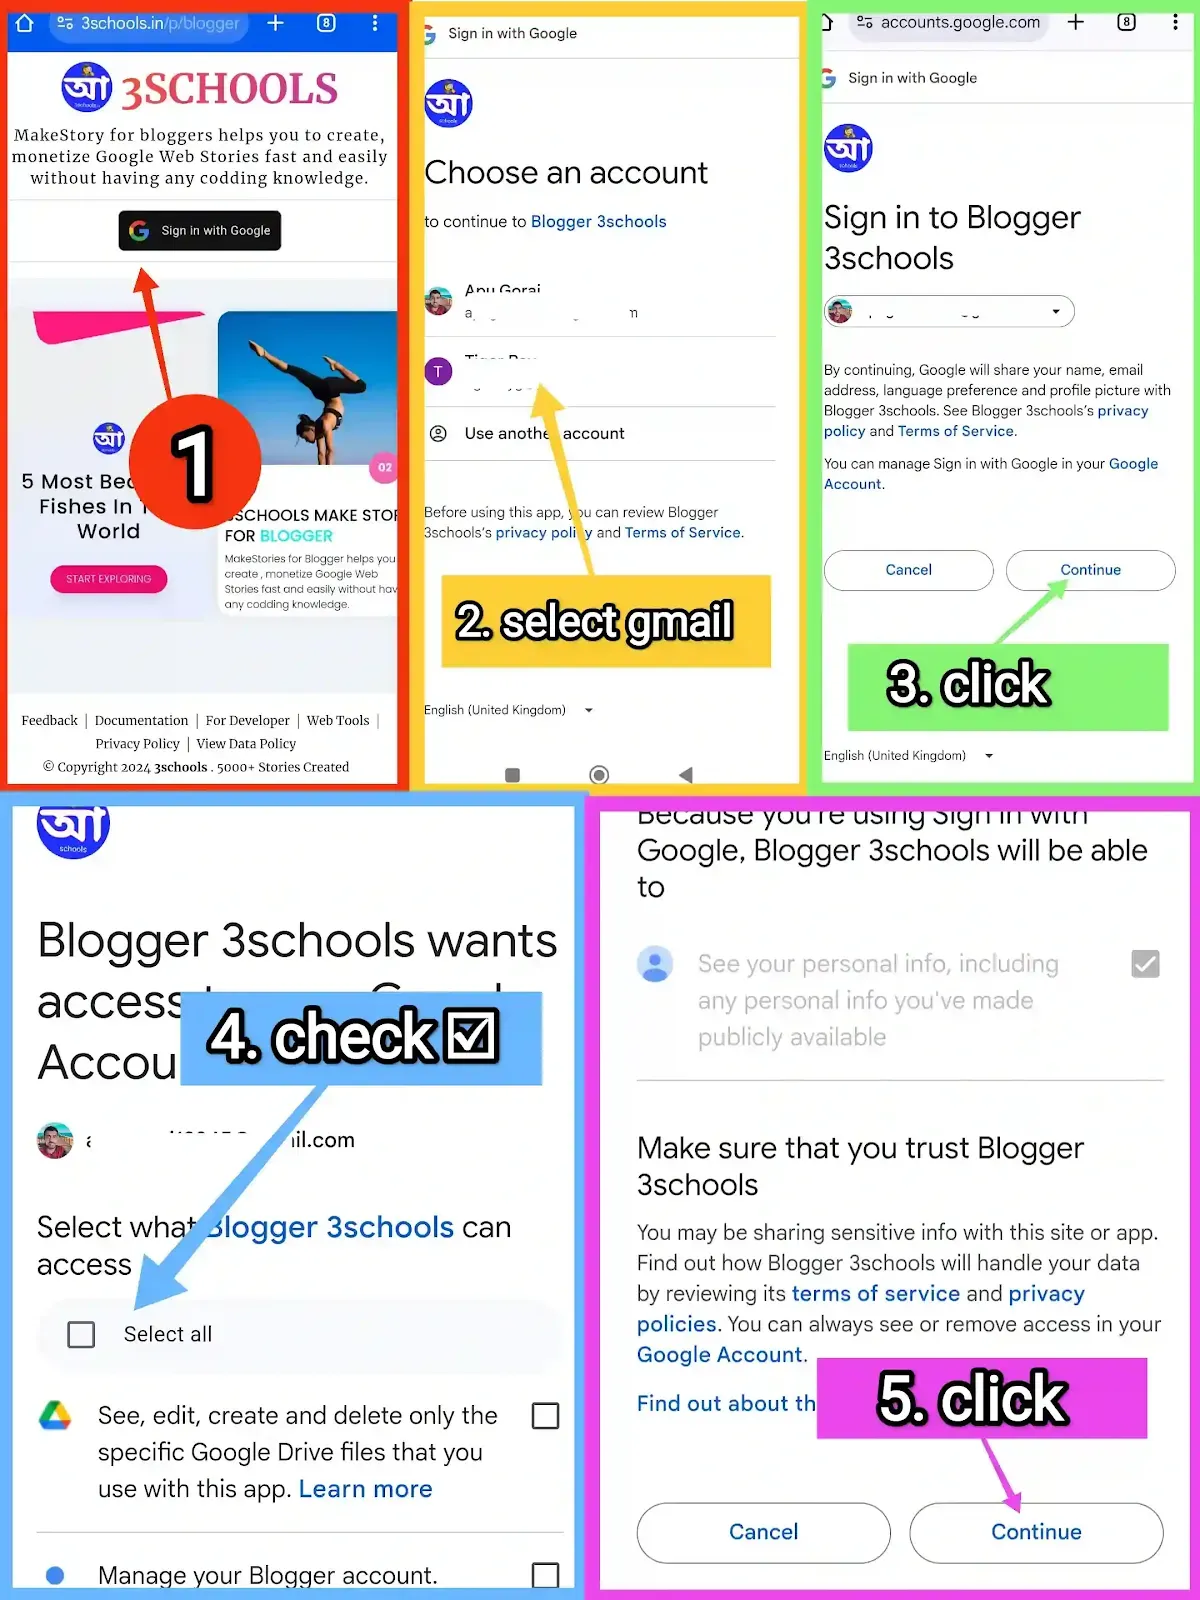
Step 3. Go to our Web Story Generator Tool => Click the "Sign In With Google" button => Complete the sign in process.

After completing the sign in process, you will see your profile pic with name, your blog list etc.

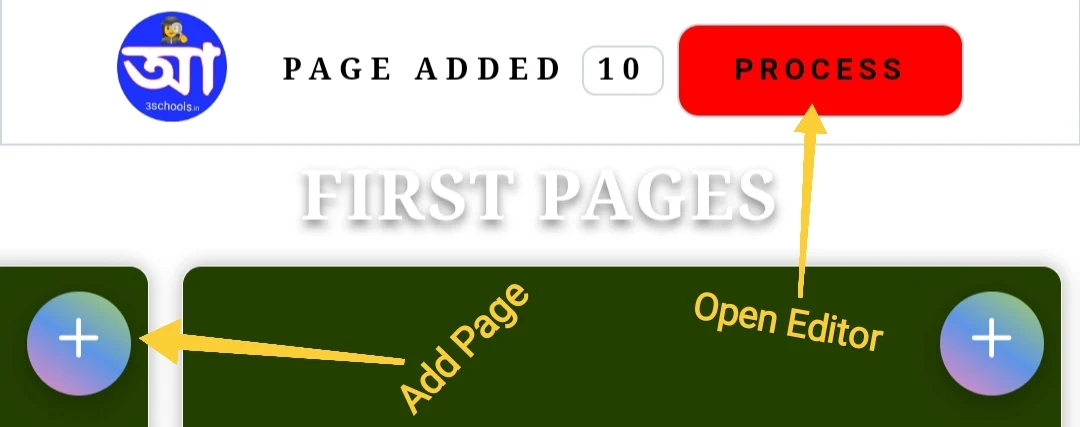
Now select your blog from the drop-down 1 and click the open template button. Now select the pages (as many as you want) by clicking the plus (+) icon from this page . Then click the process button to open selected pages in our editor.

Step 4. All the pages will be opened in our web story editor. Now visit this article and follow 1, 2 and 3 steps. (We wrote that article. So, we don't want to write it again)
After styling and changing pages, preview the web story and publish it by clicking the Publish Story button. After publishing web story, you will be redirected to main dashboard where all the created web stories will visible with some action buttons (profile photo, amp test, view, delete).
Step 5. We have included more features to our new Web Story Maker tool.
-

1. By clicking this button you can add new pages from our template and also can upload from your device.
2. By clicking this button you can make a copy of the current page.
3. Download the current page along with all its styles so that you can upload it later in a different story.
-

After checking the ✅ Tenor gif, search for animation images (gif) and add those images by clicking the plus (+) icon.
-

1. Publish the web story in Blogger.
2. Draft the web story in Blogger so that you can publish it later from the dashboard.
3. Save all the web story pages as images so you can share them on social media.
4. By clicking the backup button, you can download the current web story (with title, all settings, pages etc. ).
2. After clicking this restore button, select the downloaded file to upload the downloaded web story.
-

In our Story Editor , whenever you will see an icon like this , it means there you can add image. First click on that icon and then click on the current page setting. Now you may see a new option as shown in the above image.
-

Now you can also customize our blogger template by visiting the Layout section and customize section.
-

We provide 3schools MakeStory AI. Just write the topic, choose a number (How many pages you want), select templates and click the icon. 3schools MakeStory AI will create a web story for you.

