
As you know, I have recently launched my own Web Story Maker tool for Blogger. In this article, I will try to explain how to use this tool to create your first web story in Blogger.
How to use simple web story maker tool for Blogger. #
To create a web story in Blogger, you have to follow four steps.
- Basic Setting : for one time
- Enter the web story title.
- Add more pages and style them.
- Publish this in Blogger.
[1] Basic Setting : for one time #
Here you need to fill some basic and important information like your blog name, logo, AdSense code etc. for one time. Follow the below steps...

In the above image, I have shown the steps. Please follow the below steps.
- Click on the setting icon to open the left sidebar. Click again to close the sidebar.
- Publisher name : enter your blog or website name (e.g. 3schools).
- Publisher logo : here you have to enter your website's logo link [1:1]. You can also upload your website's logo from your device by clicking the upload button.
-
Google AdSense : if your site is approved by Google AdSense, you can
use this setting, otherwise, leave it blank as it is. To use this feature, go
to AdSense => Ads => overview => and create a Display Ad (if you don't have
already). You will get a code like following (It will be different in your
case.).
<script async src="//pagead2.googlesyndication.com/pagead/js/adsbygoogle.js"></script>
<!-- make stories -->
<ins class="adsbygoogle"
    style="display:block;"
    data-ad-client="ca-pub-1234567890123456"
    data-ad-slot="5678"
    data-ad-format="auto"
    data-full-width-responsive="true">
</ins>
<script>
(adsbygoogle = window.adsbygoogle || []).push({});
</script>
Here the AdSense pub id is ca-pub-1234567890123456 and Ads slot id is 5678.Want to use Google Analytics? learn more.. These were the basic settings, you have to write for one time. There are three other options. - Poster image : is shown on the Google Discover section. You need to create a separate poster image for each web story (this is not for one time). It must be of high quality and have a ratio of 3:4 . Read how to upload image.
- Background music : You can add a music to a web story. If the audience plays music, it will play from the beginning to the end of the web story. Click to see demo.
- Save for next time : Finally, click the Save for Next Time button. If you want to save all above details. The next time you come to create more web stories, you don't have to rewrite all the above details.
[2] Enter the web story title. #
In the Enter the title section, you must write the title of the web story. (E.g. How to create web story on Blogger.)
[3] Add more pages and style them. #
In this section, we will add more pages and try to style them.

Click on the plus ➕ icon to add a new page. To delete a specific page, click the delete icon of that page. Finally, click on the setting icon to style the particular page. (add image/video, change background color, include link etc. )

- Click on the cross button to close the left sidebar.
- Drag the slider to change the opacity of the background.
- After making any changes from this area, you must save everything by clicking the Save button.
- Next page after : Auto-advance to the next story page after a specified amount of time. The time must be positive. (default 20 seconds.)
-
Page link : you can include link to the pages.
Enter text            Enter link
Read More             https://www.3schools.in
Download              https://google.com
Visit our site        https://example.com
- Background color : There are three different background color. You can change them from this section (try it yourself).
- Background image/video : This is one of the most important sections. From here you can include background images or videos on a page.
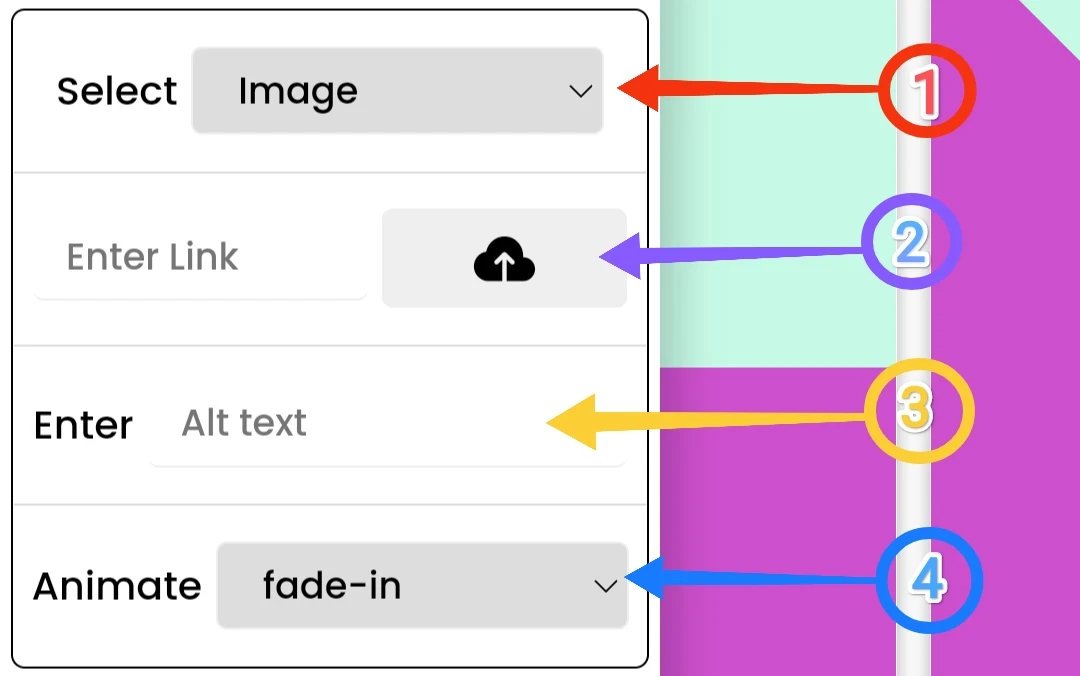
[1] : Select image, if you want to upload image. Select video, if you want to upload video.
[2] : Enter image or video link . You can also upload from your device. Read how to upload image or video.
[3] : Write image or video's alt text. (Describe the image or video under 10 words.)
[4] : Select an animation for the image or video.
- Text box : On each page, there is a text area where you can enter your content and change the text style from the editor section.
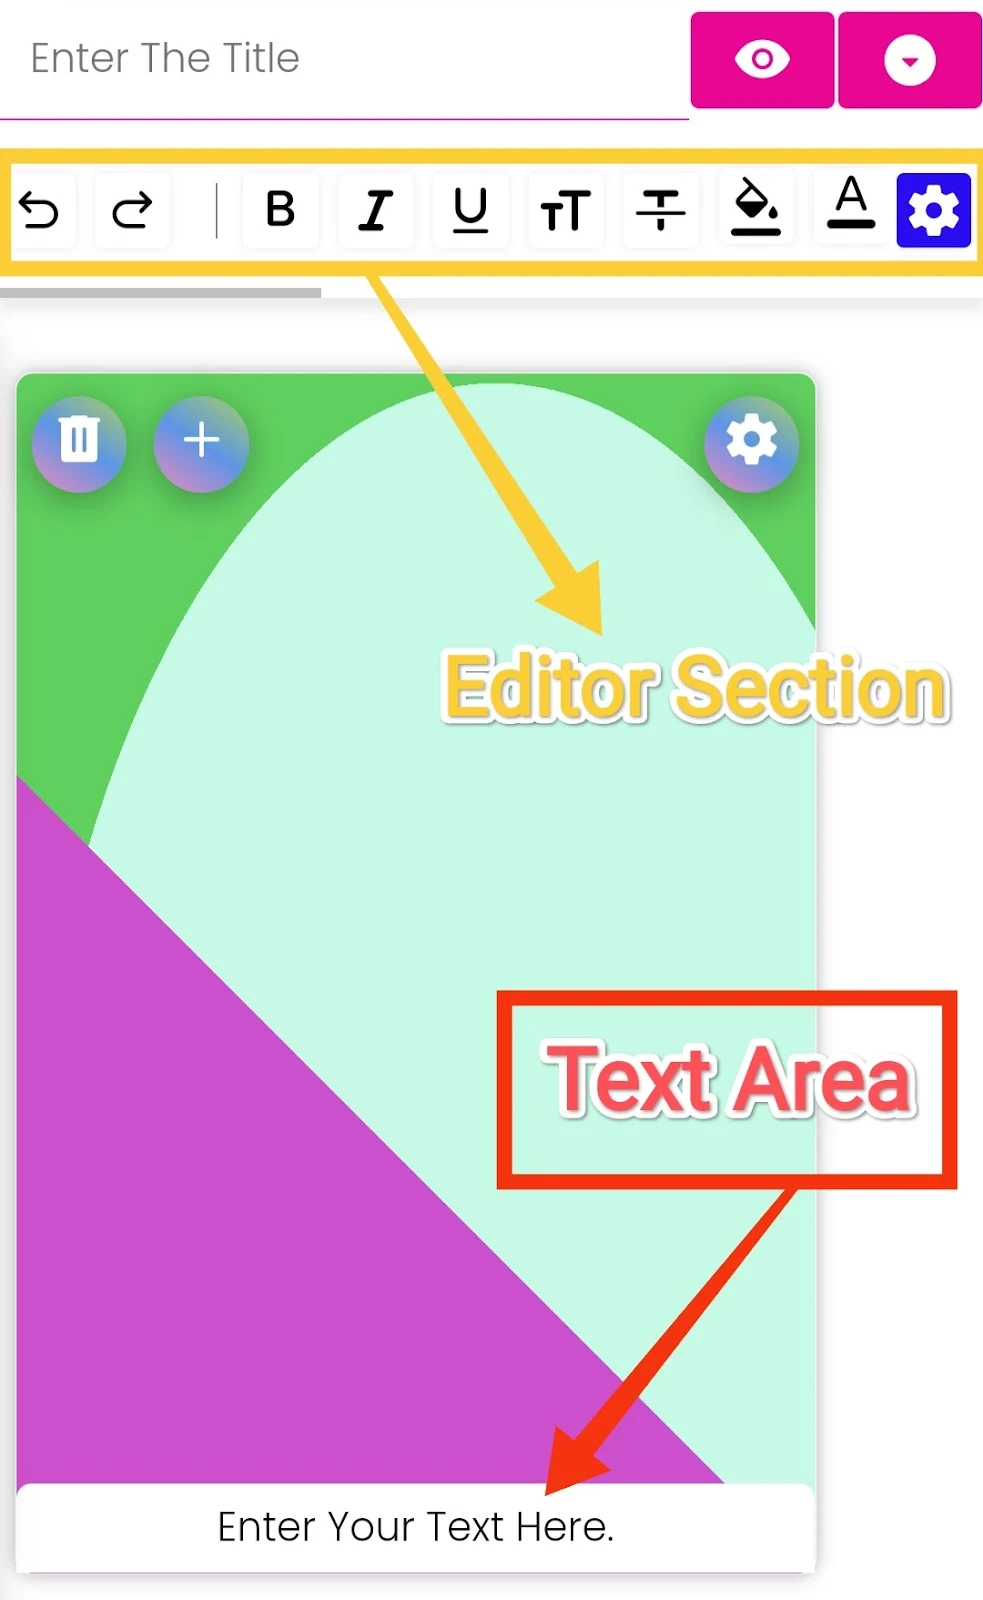
To style the text area, use this section. You can try it yourself.
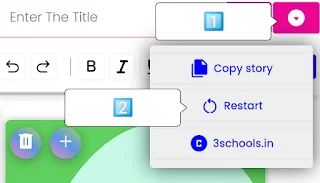
[4] Publish this in Blogger.
Finally, you have successfully created your first Web Story. Now you're ready to publish it on Blogger.
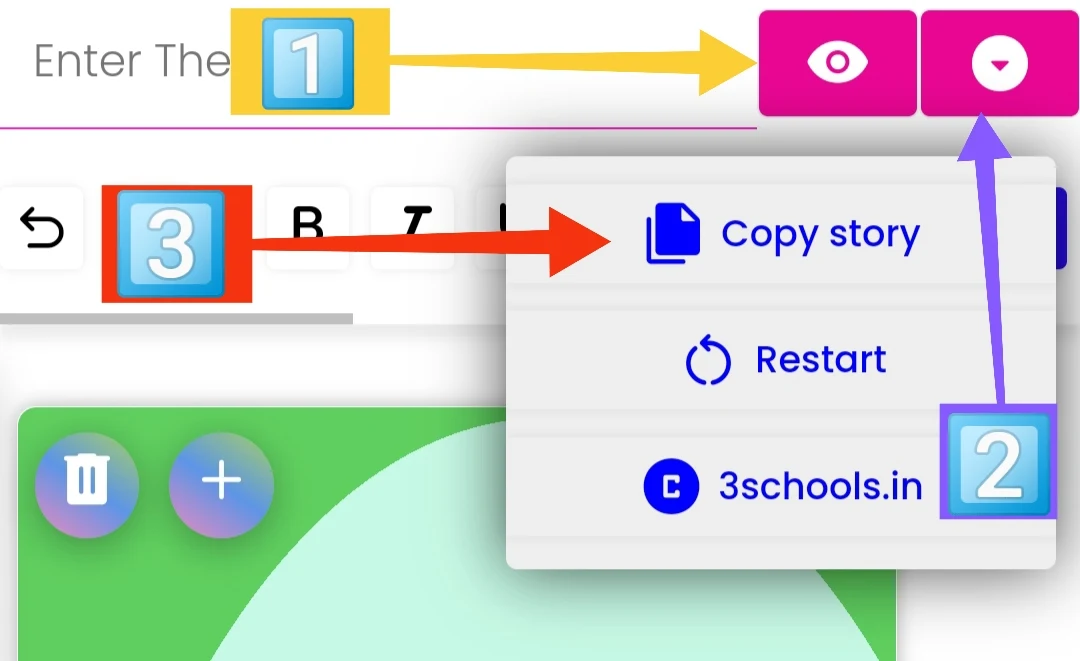
- You can preview the created web story by clicking the preview button.
- Click on the drop-down button to open the container.
- Then, click on the Copy story button to copy the created web story.
- Now, go to Blogger .
[1] => Post section => create a new post => switch to HTML view => remove everything from there => paste the copied code.
[2] => Enter the title => choose labels => create Permalink => Add search description => Click on the Publish button.
Comments (7)
How to use 3schools Make Stories for Blogger
I've done these steps logged in with Google, tapped on setting icon add background image/video. But when I paste the image link or upload from my device it is always blank.